Full disclosure: this is a living, breathing post – so if you’re seeing this I’m still not finished with my grow room.
I’ve never had a full garden in my life. Before last year I hadn’t actually put plants or seeds in the ground and grew something edible.
But over the last year, thanks in part to COVID, I have begun to appreciate the magic of putting something in the ground and watching it grow. If you know me personally, you know I get a little fanatical about things and tend to go all in to see if I truly like it.
My partner and I recently moved into a house that has 1.5 acres of land. The previous owners showed me the space they used to grow their food, and it’s a 50×50 foot space. So, of course I want to use all of the space and grow all of the things.
Trial by fire, right?
With that said, I’m going to need to start seeds indoors before transplanting them outside in order to lengthen the harvest season.
We are luck to have a functional room above the garage that I recently realized is the PERFECT spot for a grow room.
So, now I’m going to start renovating that space to be a grow room for me and this massive garden project I’m undertaking.
At first we thought me might put a pool table up there, but I kind of talked my partner into putting that elsewhere so I could selfishly have this space for growing plants.
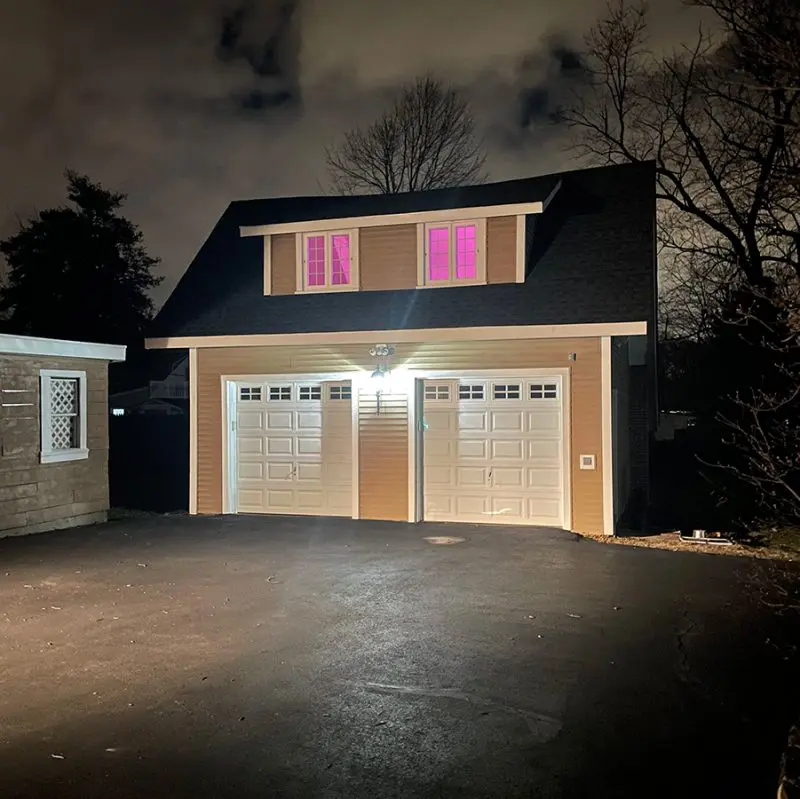
Behold, the Plant Laboratory:
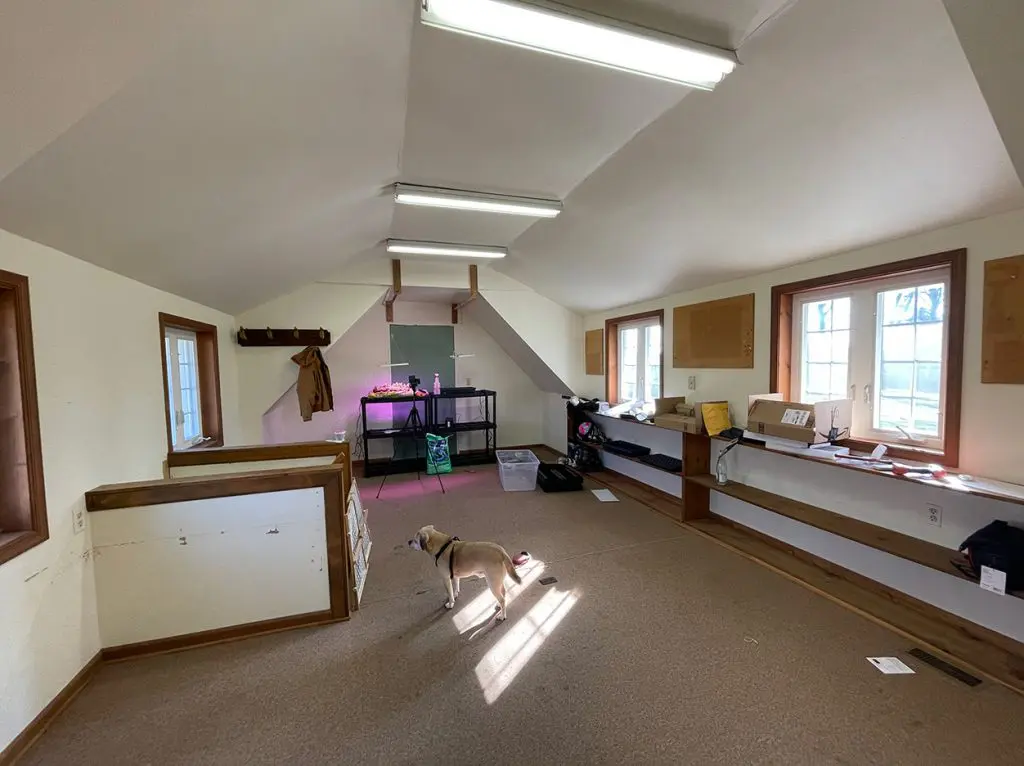
Alright, so it doesn’t look like much just yet. But it’s going to be a magical place!
Full disclosure: I have no idea what I’m doing or what I’ll need to accomplish this, and I was never a very handy gal (except when it came to helping people with computers and software), so…this should be interesting.
I don’t want to spend a fortune renovating this space as a grow room, but I also don’t want to be too cheap with everything.
I want it to be done right – and to still function as another kind of space if I end up hating this hobby after going so overboard this year 😉 I can’t believe I just admitted that.
Also, I should mention that I’m growing vegetables, not the other stuff, but hopefully this will be of value to all growers, not just the ones like me. 🙂
What I Currently Have
The things I have so far are:
- 3 Heat Mats
- 3 Thermometers
- 10 Seed Trays
- 2 Grow lights (super cheap LED ones – hey, they work!)
- 1.5 bags of seed starting mix
- A few shelving units left over from our previous house (which I may or may not use – TBD)
What I Want to Setup
Plant Growing Station
Since this is a grow room, an important use of the space is to make sure I have enough space for seeds to actually start the germination process and grow inside for about 6-8 weeks depending on the variety.
I’m planning on growing around 70 plant varieties (I know, I already mentioned that I’m insane).
I think this comes out to around 400-450 plants. I’m going to use this rough estimate to figure out what I need in terms of shelves, lights, heat mats, etc.
Workstation/Desk
I want a place to be able to record product reviews and videos about what I’m doing. Not to mention, if I want to work among the plants (such a millennial) I want a space to be able to do that.
The room is large enough for both, so I am just going to need to add a desk, get another desk chair, and that should really be it. I may end up getting another external monitor for that space so I can really get stuff done there, but I’m not sure what the humidity is going to look like yet, so for now it’s just a desk and a chair.
Remote Access
I want to be able to remotely see what’s going on in the grow room.
I like tech and being able to check on things when I’m not around just to make sure everything is running smoothly.
While I think some of the automation stuff may come later, I at least want some insight into the happenings in the all important grow room 🙂 More on this later.
Other Considerations
Flooring
Right now, the plant laboratory (erm…grow room) has carpeted floors. While I realize this is kind of important to replace in order to avoid mold, I just don’t think it’s going to get done before I need to start actively using this space in a few weeks.
I was laying in bed and had an idea to just buy some rubber mats to put down on the floors below the shelving units. Something like this:

It’s made of SBR (styrene butadiene rubber), which according to the Green Building Supply is eco-friendly and can withstand a good amount of heat.
I also figure it’ll be a good addition to our home gym once I do get around to actually replacing the flooring in the grow room.
Painting the Walls
The walls are currently white, but they’re not freshly painted and have quite a bit of holes that need to get patched up. I’m going to try to get this done in phase one, but I’m not sure it’ll happen.
There is also a huge piece of drywall that was installed but it has like a 1/2-1/4 inch crack around each of the sides – and it’s blue/green so I should probably get that painted:
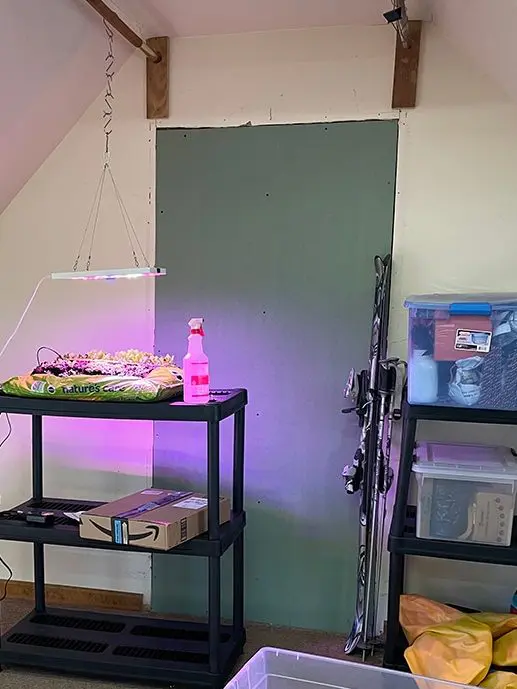
I found this spa paint that seems great for an environment like this since there will be some humidity floating around. I may give that a shot, or just go with a coat of primer for now.
I know, I know, I could also just set up a nice grow tent and be done with this whole thing, but I want it to be a little bigger.
A New Door/Cover for Temperature Control
Right now, the space has a stairway that provides access from the garage to the grow room. That’s great, but the garage isn’t exactly a warm place in the winter, and so the grow room temperature is hard to control. This is what I’m talking about:
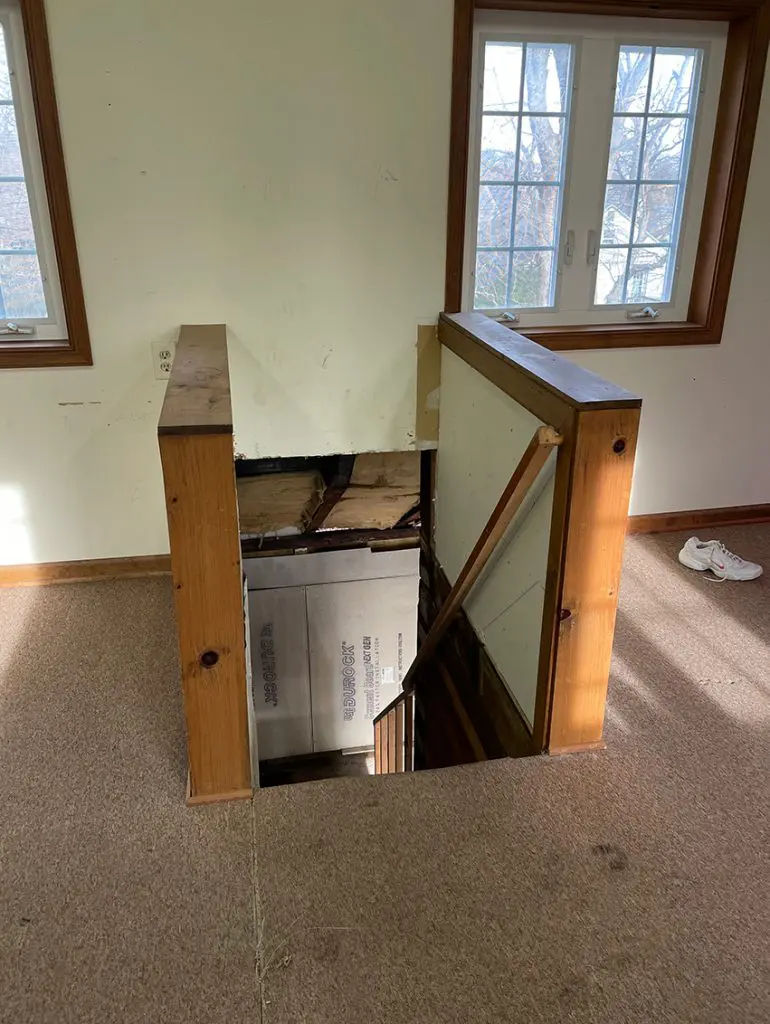
There is a mini-split heating unit in the grow room, but some of that heat gets lost through that giant hole, so I need to figure out a good solution for this.
I am torn between trying to find a trap down type of thing, or just getting a cover that snaps on and off when I come and go.
Long term, I think it might involved installing a door halfway down the stairs, or adding some drywall to the sides there to take those half-walls all the way up and add a door at the top of the stairs.
Water Source
One of the downsides of having a detached garage is there is no water source out there. Obviously, plants and seeds need water to grow, so I need to figure out a solution here.
What I’m thinking of doing, is running a 75 foot hose (or connecting two depending on the distance) and having it reach up the garage stairs.
I checked around for potable water hoses because I don’t want weird stuff leeching into the water I’m putting on my plants. Kind of like the ones they use in RV’s and such.

I’ll need to get a hose splitter so that I can use a hose for other things around the yard without moving this huge hose around.
I’ll have to measure the length from the hose bed to the garage and figure out if it will reach up the stairs like that – should be an interesting project!
HOSE LENGTH NEEDED
- Lighting – ceiling lights swap out
- Changing the lock to the garage
- Pest Control
- fire safety – fire alarm
- Carabeeners metal poles to slide lights (https://www.dudegrows.com/curtains-in-the-grow-room/)
There is a lot going on here, and I have a matter of weeks. So I think I’m going to have to break this up into phases.
A Few Additional Things I Want to Add:
Aside from the obvious ones – a full growing station – there are some other things I really want to get done before I start my seeds.
Security Cameras
I don’t necessarily want these for the security part, but to check in on my plants and see how they’re doing. I’d love to get some cameras in there to run a few time lapses for you guys, but I think that’s going to be a phase 2 addition.
This is also going to require wifi out there, which right now is a little sparse. I have a Google Nest extended I’m going to try and use for this.
These are the ones we have around the house now and I like them quite a bit so I’ll probably setup 1 or 2 of these in the grow room.
Mobile Temperature Checker
I really want the ability to get notified when one of the heat mats is overreacting (or under-reacting) so I don’t have frozen or cooked seeds. I can’t find a good solution to this yet without spending thousands, so for now I’d like to be able to check the overall room temperature and humidity from my phone.
I found this one and it shows temperature, humidity and risk of mold (which I’m not sure I trust), but it seems pretty good overall. At $11, I might have to just test it out and see.
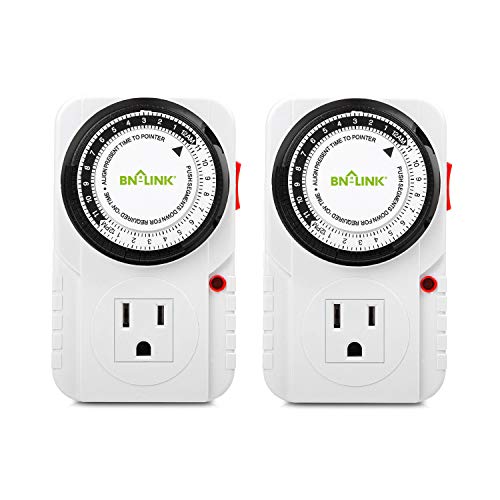
Light Timers
To turn the lights on and off automatically, I think I’m going to go with some basic analog timers because I’ve seen tech fail too many times and the wifi isn’t great in the garage.
I like the mechanical/analog ones because they don’t rely on technology to run properly, and these ones are grounded which means they protect your devices against a power surge. These are the ones I used in the past, and will be using in the grow room.
Building a Grow Room in the Garage
So now that I know I need space for around 450 individual plants, and some of the features I want to finish in Phase 1, I need to get some other things nailed down so I can start planning this out better.
What Shelving Setup I am Going to Use
I mentioned that I already have some heat mats and trays, but are those going to be the most efficient for me? I also need to figure out what kind of pots will go into the trays.
You can skip to the next section if you find this boring, but I haven’t come across someone explaining this yet and wish I had. I’m adding it here in hopes that it helps someone setup their own grow room.
The Fun Math to Figure Out the Best Setup
I hate math too, but this project requires a bit of it to make sure I have the right setup.
That said, there are 3 options I see in moving forward with this project.
1. Use the shelves I currently have and buy more small heat mats to fit in that space. The plus side here is that I don’t need to buy shelves and can use what I have. The down side is that it would take like 25+ heat mats at the 10×20 size to make this work, and that sounds like it could get expensive, AND might be a fire hazard.
2. Buy 4 foot long shelves and save a little money by getting the 48 inch long heat mats so I need less of those, but do have to spend money on shelves.
3. Buy 6 foot long shelves and get the commercial grade heat mats and longer lights. I need less shelves this way, but still have to buy shelves.
So I got out a notebook and started trying to figure out the math. This is what it looked like:
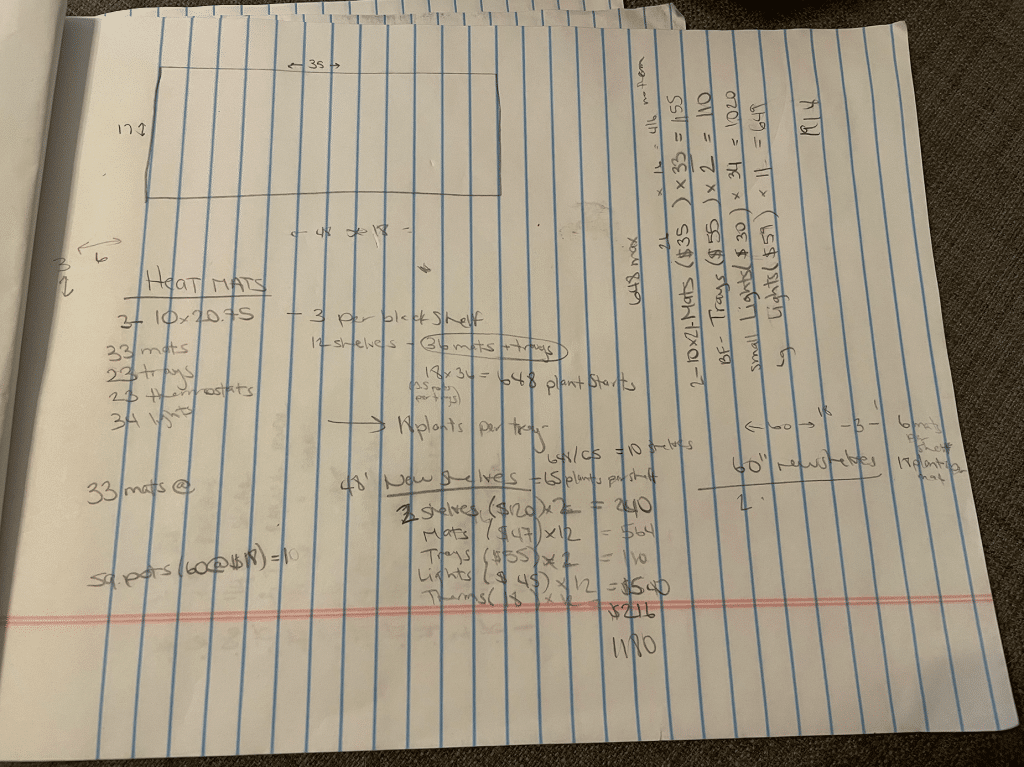
Wow even I have trouble reading some of that back haha. So I put it together in chart here so you can understand it.
<table width=”100%” border=”10″ cellpadding=”4″ cellspacing=”0″>
| Category | Current Black Shelves | 48 inch shelves | 60 inch shelves | |
| Shelves | Cost per shelf | $0 | $149 | $200 |
| Shelving cost | $0 | $298 | $200 | |
| Heat Mats | 10×20 Heat Mats Needed | 13 | ||
| 10×20 Heat Mat Cost | $35 | |||
| 10×20 Heat Mat Total Cost | $455 | |||
| 20×48 Heat Mats Needed | 6 | 6 | ||
| 20×48 Heat Mat Cost | $60 | $60 | ||
| 20×48 Heat Mat Total Cost | $360 | $360 | ||
| 21×60 Heat Mats Needed | ||||
| 21×60 Heat Mat Cost | $110 | |||
| 21×60 Heat Mat Total Cost | $0 | |||
| Grow Lights | Small Lights Needed | 8 | ||
| Small Lights Cost | $36 | |||
| Small Lights Total Cost | $288 | |||
| 4 Foot Lights Needed | 3 | 5 | ||
| 4 Foot Lights Cost | $69 | $69 | ||
| 4 Foot Lights Total Cost | $207 | $345 | ||
| Thermostats | Thermostats Needed | 0 | 0 | 6 |
| Thermostat Cost | $19 | $19 | $19 | |
| Thermostat Total Cost | $0 | $114 | ||
| 10×20 Trays | Bootstrap Farmer (10 for $55) | 165 | 165 | 165 |
| Pots | 3.5 inch (60 @ $19) | 8 | 8 | 8 |
| Pots Total Cost | 152 | 152 | 152 | |
| Total Costs | $1,135 | $1,257 | $1,411 |
So as you can see (or maybe that was nauseating to you, if so, I apologize), keeping the shelves I have and just buying smaller heat mats and such was slightly cheaper.
So I went with that option, right?
Wrong. You see, I’m a millennial – and without feeding into all of the stereotypes out there, things aren’t that simple. Just kidding, the millennial thing isn’t the reason, or maybe it plays a part?
In all seriousness, I have issues with plugging in 13 heat mats (on top of the 3 I already own), 16 thermostats (one for each heat mat), and 8 grow lights. That’s 37 devices being plugged into 3 outlets.
I know next to nothing about electricity but that seems like a fire hazard, and while I’m sure they are super nice people, I don’t want to meet the firefighters already.
So I’m going with the 4 foot shelves – they look nice and seem to be the best option here.
Now I Know That I Need:
- 33 seed trays
- 3 grow lights with a 4 foot by 4 foot range
- 6 heat mats (these come with thermostats)
- 0 additional thermostats
- 2 x 4 foot shelving units
I’ll only be needing 6 of the 12 shelves so I can use the others for growing microgreens or storing stuff.
Yes, I could have gotten one shelving unit since they both have 6 shelves each, but then I couldn’t double up on the grow lights and I would have needed 6 grow lights.
I’m not doing this on the cheap, but I don’t want to be stupid either 🙂
Plant/Nursery Pots
As I mentioned before, I think I need room for 450 individual plants. It seems like there are quite a few different camps of people when it comes to starting seeds. Those different camps read something like this:
- People who plant similar varieties together in one tray and separate them once they’ve germinated and have their first set of leaves.
- People who use those super small 128 or 72 cell trays – I just can’t…
- People who plant each plant individually in its own pot from the beginning
I’m a little more neurotic than most, so I want each plant to have a pot and be in that same pot until they get transplanted into the garden.
A few reasons I feel better about doing it this way.
Reason #1 – If my last frost date (which is supposed to be April 12th) ends up being wildly wrong, I want each plant to have enough space to grow for an extra week or two inside. If I use a tray with a bunch of holes in it, they don’t really have room to expand and might start encountering issues.
Reason #2 – Since I have no idea what I’m doing and am just following the seed packets guidelines for when to start seeds, I might be starting them too early, and then – same as above – they won’t have enough space to grow.
Also, I feel more comfortable when things are separated and have their own space.
I wrote an article a few years back about having 8 separate bank accounts so I can keep everything separate and know what’s what. Some people think I’m nuts, but it keeps me organized so I don’t really care what they think 🙂
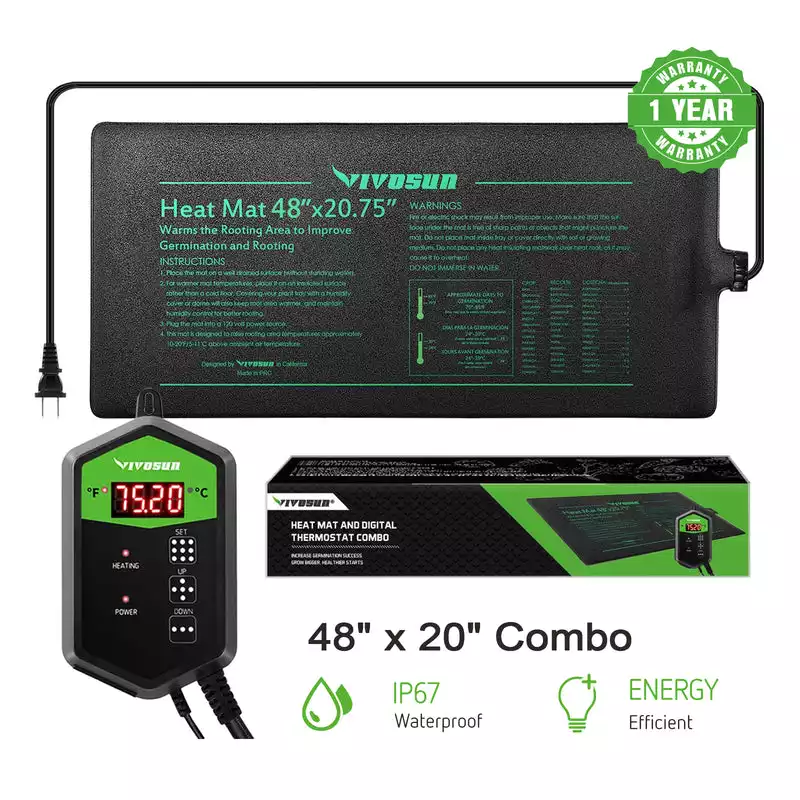
Heat Mats
I’m a big fan of the Vivosun heat mats. They haven’t let me down yet, the price on them is great and they have multiple sizes aside from the typical 10×20.
I’m going to need 20×48 inch heat mats and they have them for around $60 including a thermometer, which is great.
Estimated Cost: $360
- Most reliable heat mats on the market
- Comes in multiple sizes
- 1-year warranty
- SAVE $6 Today when you buy directly through Vivosun
Finding the Right Shelves
It took me a really long time to find the right shelves. I was about to hit the “buy button” on Amazon on one that was a great price, and then realized that they were only 18 inches deep. Ughhh.
The heat mats I’m getting are 20 inches wide, so that just wasn’t going to work. I mean, it probably could with them hanging off the edge a little, but that might compromise the life span of the mats, and I just want this done right.
So I went back to the drawing board, I searched Costco’s website and found a good option, but they were $200 EACH. We don’t have a Costco membership (yet) but are planning on getting one, and without it they charge you an extra $25 fee or something.
My partner was sleeping but I wanted to talk to her about signing up for a membership so I could save that. While I was waiting for her to get up, I kept searching around and found that Home Depot essentially had the same shelves at $149 each – much better.
Thanks for sleeping in babe!
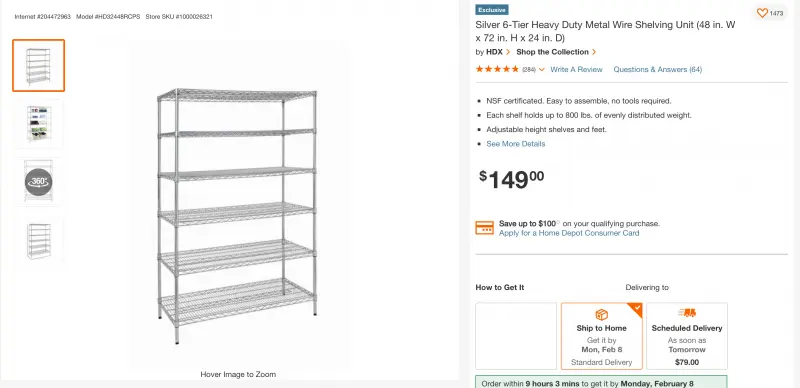
Since I only need 3 shelves on each one, I’ll probably leave off a shelf or two on both units so there is more space between the shelves for plants to grow.
Estimated Cost: $298
Grow Lights
This is going to be the hardest part for me. I know nothing about lumens, kilowatts, micromoles,
I bought these grow lights to use when I wanted to start some lettuce inside – they worked great, but they’re really small, and I’m not sure what aspect of them made it work great.
Also, they made me look like I was growing something nefarious….
Was it the pink color that made my lettuce grow so well, or was the lumens, or something else?
I do know that I want LED grow lights because I’m not all about adding more heat to the plants and wasting energy.
Other than that I’m lost.
I kept seeing these Barrina lights pop up everywhere and they got raving reviews so I figured I’d give them a shot.
They come in a 6 pack and are 4 feet long, so I’m thinking 2 on each shelf?
I guess my neighbors will just have to keep wondering what their new weird neighbor is up to. Could be a good conversation starter! Or the reason cops show up at my door.
Estimated Cost: $115
Trays
As I mentioned before, I have some Bootstrap Farmer trays and really enjoy them. They’re super durable and have a warranty, so if they crack or break I know I’m covered. Plus they’re BPA and other toxic chemical crap free, so that makes me feel better about spending a little more on them.
The most durable seed starting trays on the market. They are more expensive than others, but will last a lifetime.
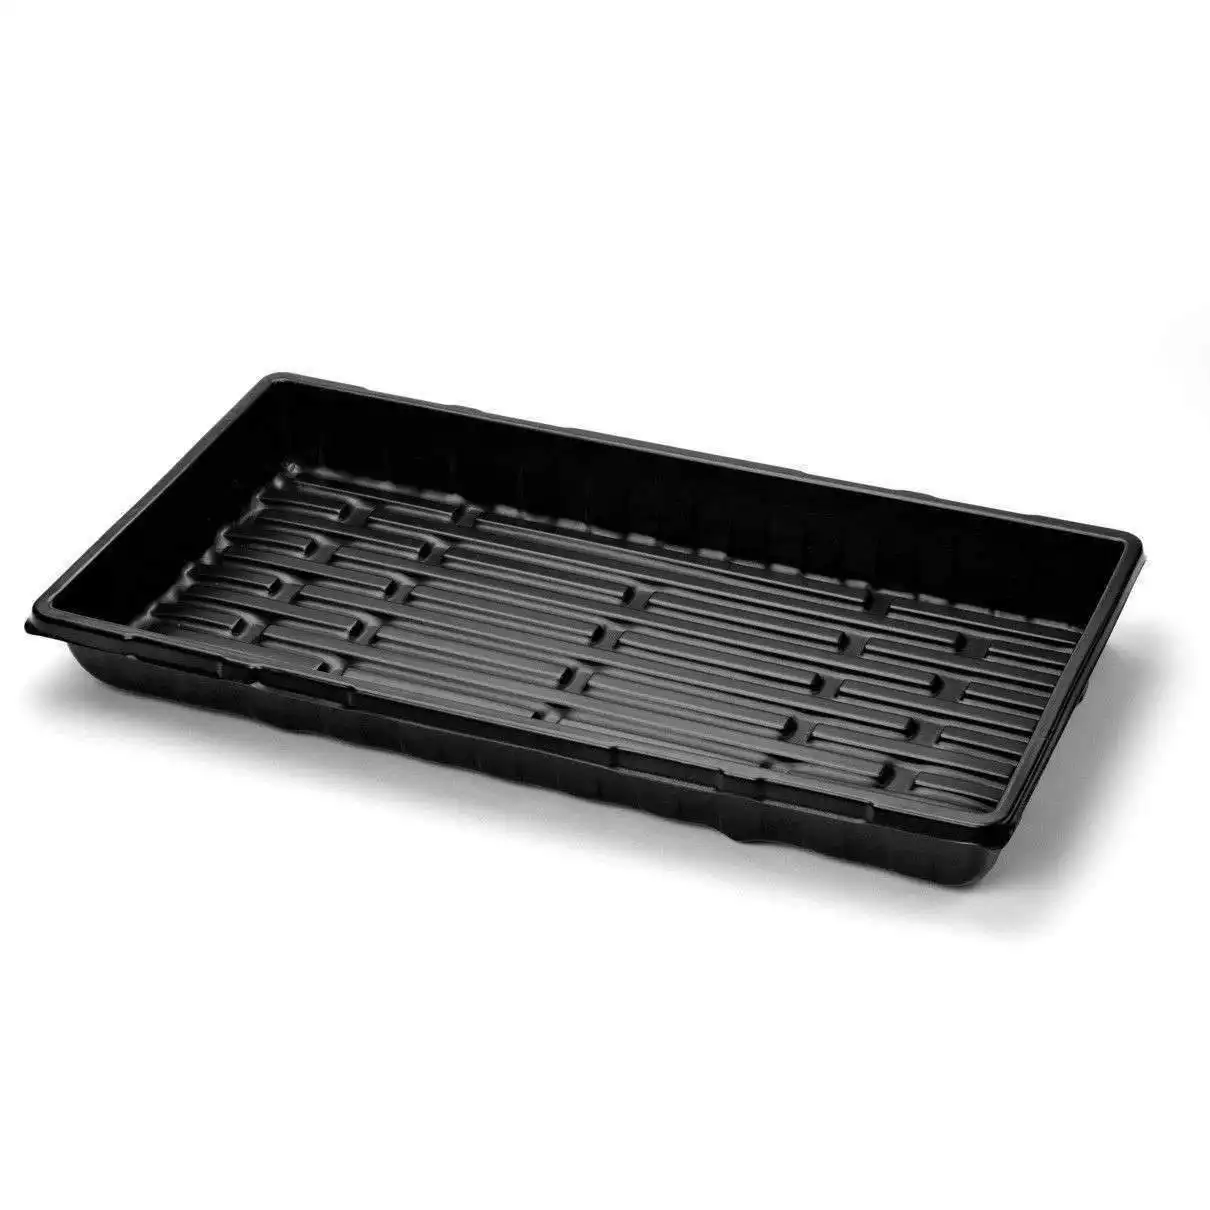
They offer a discount if you buy 30 vs 10 at a time, so it was slightly more cost effective.
Estimated Cost: $130
Putting it Together
Prepping the Walls
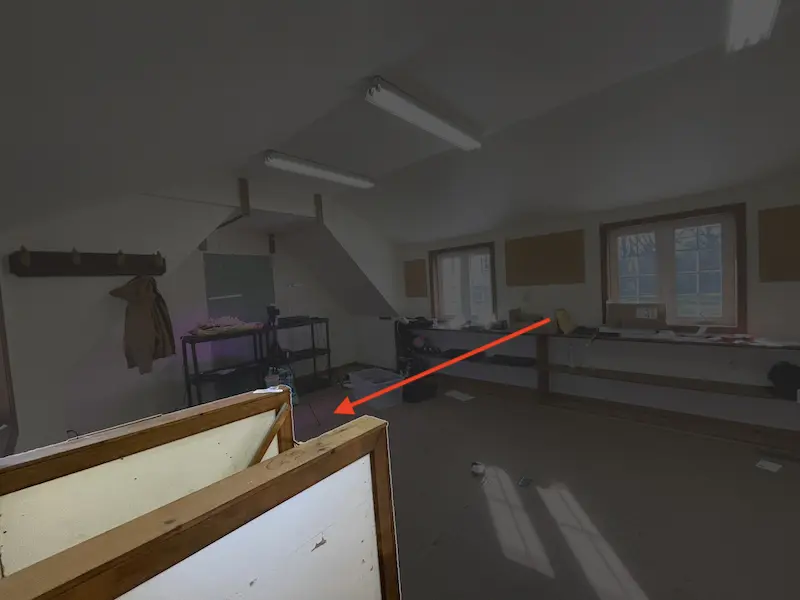
The previous owner used the space as his office, so there were a few corkboards hung up around the room. I unscrewed those and it already looks 100 times better.
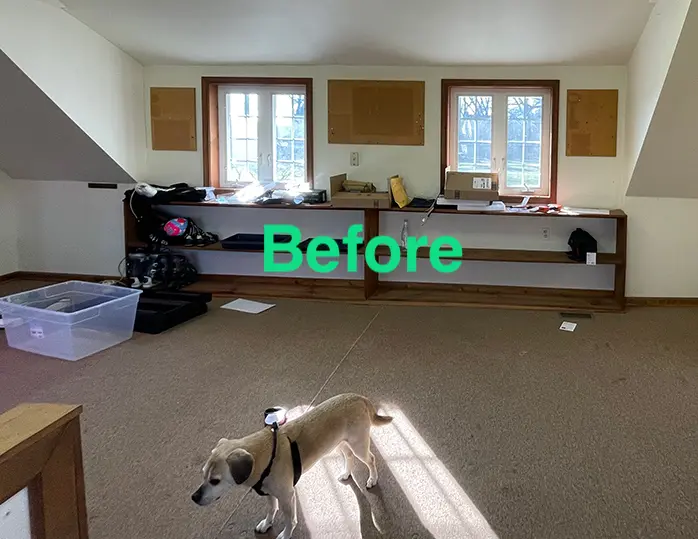
I do want to end up spackling and painting, but these are going to have to come later in the process.
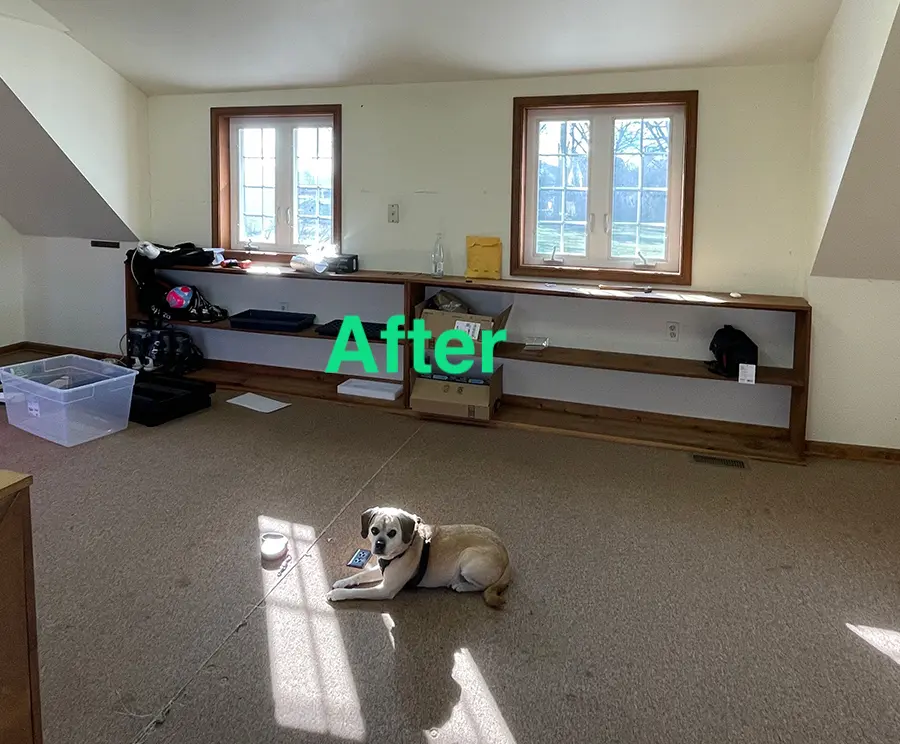
Growing Shelves Setup
After it taking forever to find the right ones, I was thrilled to get these setup.
This was a DOOZY. I had them in the garage and then planned on carrying them up the stairs, but these boxes were heavy and awkward for one person to carry up the stairs. And the one I got halfway up may have come crashing down on me….
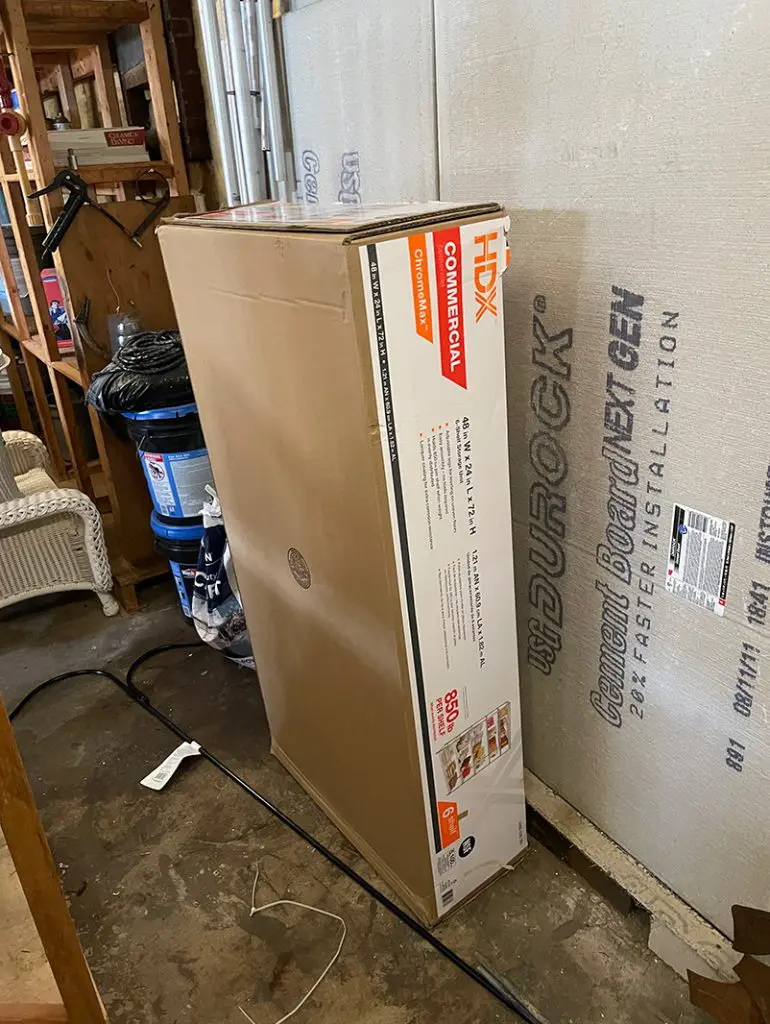
So I ended up massacring the box in the garage and carrying the pieces up separately. You think I’m kidding?
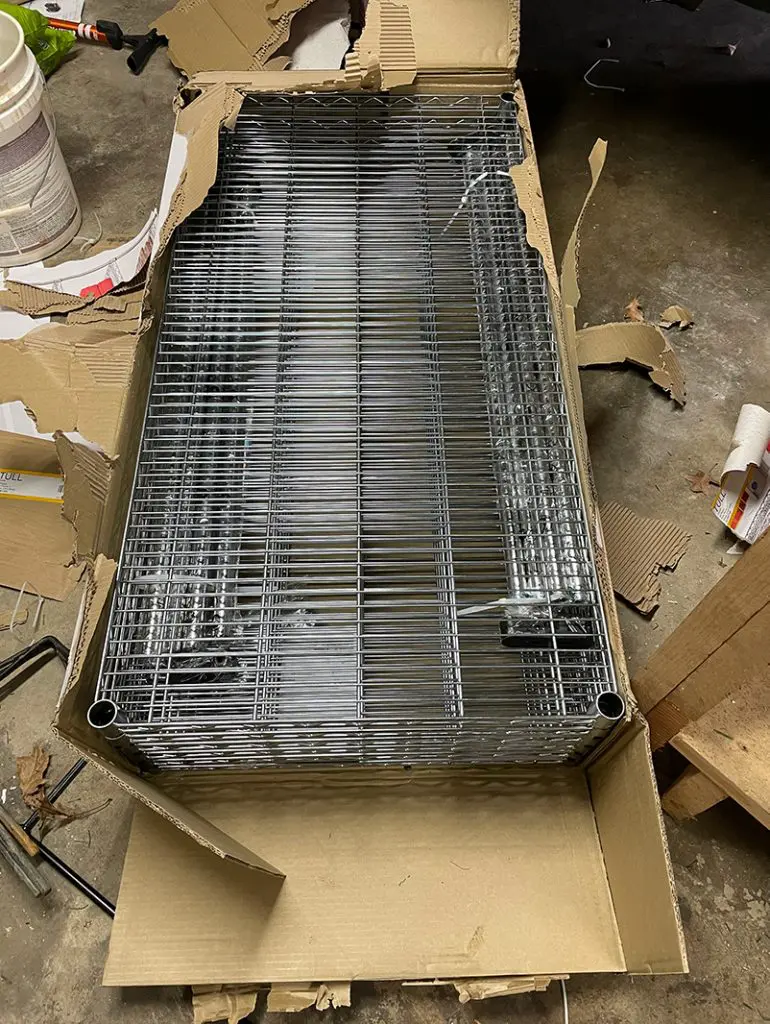
So after carrying these up piece by piece (it took way longer than it should have), I finally started putting them together.
I’m impatient with these kinds of things and I never end up reading the directions. So it probably took 9 times longer than it needed to.
Anyway, all in all it took about 2 hours to set both of these shelving units up.
Here is the before and after:
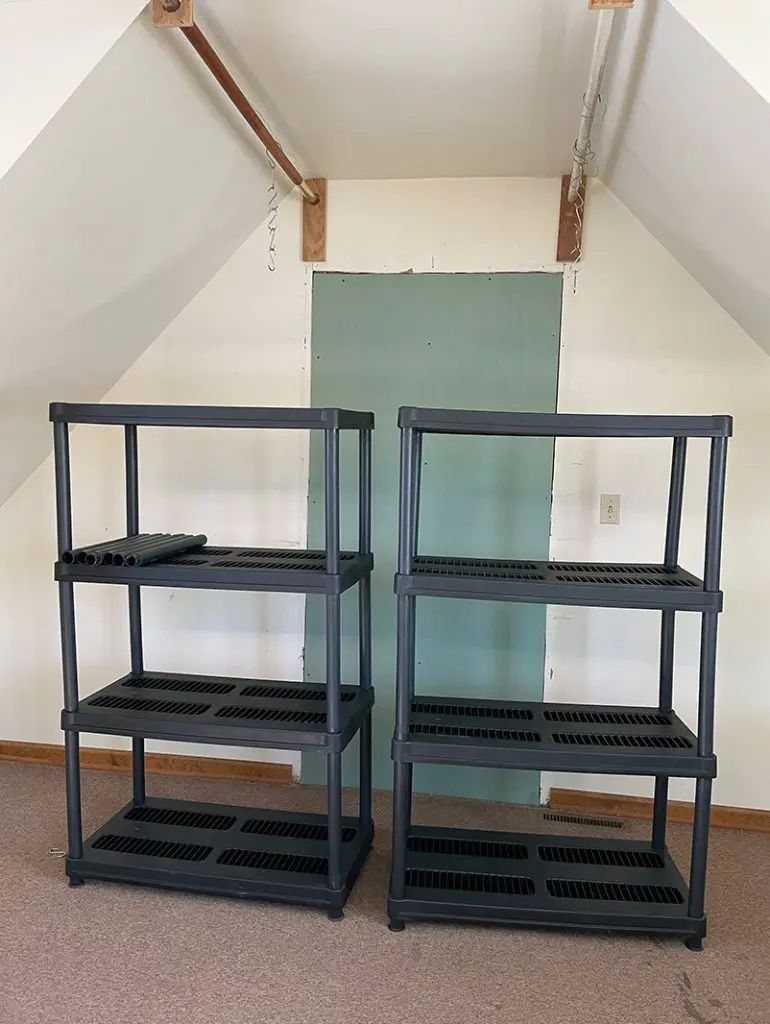
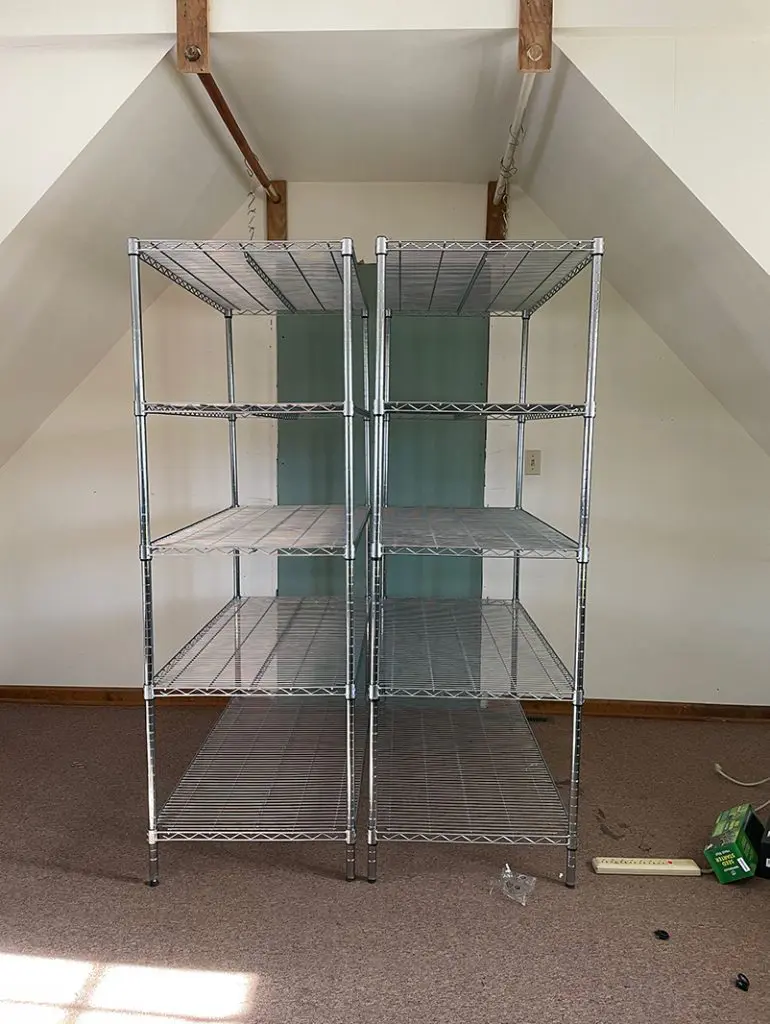
Much cleaner if you ask me!
Next Steps:
- Spackling
- Painting
- Cleaning
- Setup Water Source (i.e. hose configuration)
- Buy the rest of the heat mats
- Buy more seed starting mix
- Start seeds(!)
The Final Cost for the Grow Room
Everything I Bought:
- Heat mats: $360
- Rubber flooring: $41.67
- Shelves: $298
- Grow lights: $114.99
- 3.5 x 3.5 inch pots: $126
- Trays: $130
- Humidity/Temperature Sensor: $10.99
- Camco Hose:
- Hose Splitter:
- Desk: $0 – reusing an old one
- Desk Chair:
- Security Cameras: $0 – already had extras
- Light Timers: $0 – had extras from previous owners
- Beer Fridge: $0 – the previous owner was amazing and left us his old beer fridge in the garage, so while it’s not “in” the grow room, it’s at the bottom of the stairs, and I’m here for that.
Total cost for the grow room: $1070.66
This varies a little from that chart above – I found cheaper lights, realized I needed one less pack of trays since I have a few already, etc. I also added a few things to the list like the hose and temperature sensor.
Overall it was pretty close, and so far, I’m happy with how it came out.