Swiss chard microgreens can be grown in virtually any space, so they’re perfect for people who don’t have enough room for a garden.
Swiss chard microgreens are known for their fast growth time, making them the perfect crop to use if you are in a hurry. To learn exactly how to grow them and how to get a high yield, keep reading below!

| Product | Quantity | Link |
|---|
Types of Swiss Chard
You can use any kind of swiss chard seeds for growing microgreens, but here are a few common varieties.
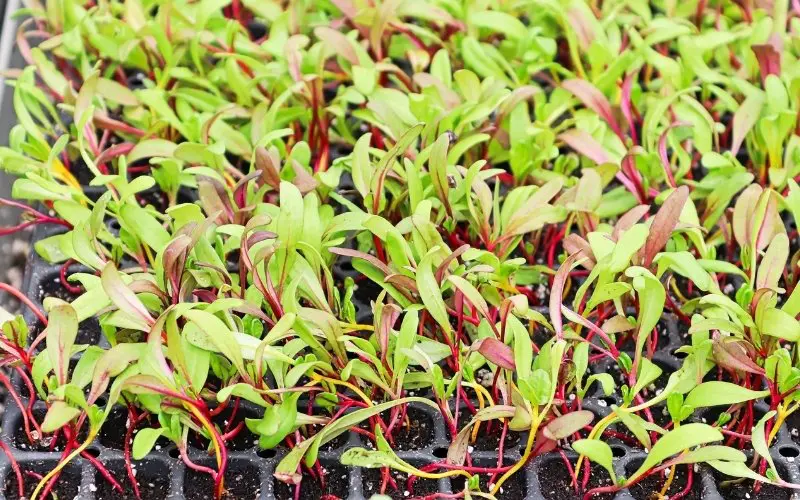
- Rainbow Chard – this variety comes in a bunch of different colors, like the name implies. You might get red, yellow, orange, white, or pink stems with dark green leaves.
- Ruby Red – Ruby red is a variety that has beautiful red stalks, as well as the red veins on the leaves.
- Rhubarb – Dark red stems and veins, looks similar to rhubarb
Again, you don’t need to get seeds that are specifically called “microgreen seeds”. Yes, you’re growing microgreens, but that means you’re just not letting the plant get to full maturity, so you can use the same types of seeds.
How to Grow Swiss Chard Microgreens
To grow Swiss chard microgreens, plant the seeds in soil & allow them to germinate in a dark, humid environment. Water them daily and ensure they are receiving ample amounts of light and water. To achieve a high yield, place the seeds under a blackout dome for 3-5 days during germination.
What You’ll Need
While it’s easy to grow microgreens, you will need a few items to get started:
- Swiss Chard seeds (you don’t need seeds marketed as microgreens seeds)
- A container with holes for drainage (microgreen tray or another plastic tray)
- A container without holes for catching excess water – Bootstrap farmer has my favorite one
- Swiss Chard Microgreens growing medium (i.e. soil, or rockwool)
- Light source (i.e. grow lights)
- Heat source (i.e. heat mat or room with high temperatures around 80-85 degrees Fahrenheit)
Where to Grow Microgreens
Swiss chard microgreens are usually grown indoors, but you can grow them outside if you want. If you choose to grow them in your grow room or indoor space, make sure they are receiving plenty of light, around 8-10 hours per day.
While many people try and grow things in a south-facing window, oftentimes those windowsills don’t get as much light as you think they do. This is why I highly suggest getting a grow light to make sure they are getting enough light.
With microgreens, you want them to be thick and healthy. This can only happen if they are exposed to an adequate amount of sunlight.
If you notice your microgreens are pale in color, then they may not be receiving enough light. Ensure they are receiving at least 8 hours of direct light daily.

Soil or Growing Medium
Before placing your swiss chard seeds in soil or another growing medium, you can increase the germination rate by soaking them in cold water for 15 minutes. After they have been soaked, drain the seeds and plant them under a thin layer of 1/4 inch of moist soil.
Swiss chard microgreens should be grown in a high-quality seed starting mix.
No matter the type of soil you are using, one thing remains consistent: the soil that is used for these seeds should be moistened and never dried out.
Germination Period
To get a high yield, the seeds can be placed under a blackout dome for 3-7 days during their germination period. Be careful when doing this as the blackout dome can cause mold due to the high moisture and humidity levels.
The most common method is to put another tray on top of your microgreens tray. This can help block out the light and provide warmth. Humidity is crucial during the germination period, so make sure to water the microgreens frequently.
Once the Swiss chard microgreens have germinated, they can be placed under grow lights, or natural light if you’re growing them outisde.
Watering Microgreens
Watering can get a little tricky with swiss chard microgreens. You want to keep the soil watering from the bottom is a popular method for Swiss chard microgreens.
Bottom watering is one of the big reasons I advocate for having 2 microgreens trays. One with holes for drainage, and one without holes to hold the water.
To bottom water, fill the bottom tray (the one with no holes) about 1/3 of the way with water. Place the holed tray containing the soil and seeds on top of that watering tray.
Wait for about 15-20 minutes to give the seeds and roots time to get a drink. After that, drain the water from the bottom tray. Do not leave the water in the bottom or you will cause the soil to be too wet.

Keeping the soil moist is key to growing microgreens. How often you water your microgreens depends on how much light they are getting.
If they get 16 hours of light each day and the environment is hot and dry, you may need to water them every day. A quick way to check this is by checking the top inch of the soil. If the top of the soil is dry, then that is a good indication that they need to be watered.
Although Swiss chard microgreens need ample amounts of water, don’t try and keep them soaked at all times.
Swiss chard microgreens are susceptible to mold growth as they grow under moist conditions. Because they are already vulnerable to molding, avoid watering them too much as this will increase the chances that they will develop mold.
When to Harvest Microgreens
Harvesting Swiss chard microgreens is a pivotal step in the growing process. Microgreens are a very fast-growing crop but, just how quick are they to be ready for harvest?
After planting the seeds, they should be ready to harvest after two to three weeks. Once you start seeing their first true set of leaves, this is a sure sign they are ready to be harvested.
How to Harvest Microgreens
To get the highest yield, you’ll want cut your microgreens with a super sharp knife like this one. Cut your greens above the soil surface to make sure you aren’t getting any soil or growing medium on the greens.
Once you’ve harvested swiss chard microgreens, you can store them in an airtight container or plastic bag. Don’t rinse them off until you’re ready to use them. They’ll generally stay good for around 1-2 weeks.