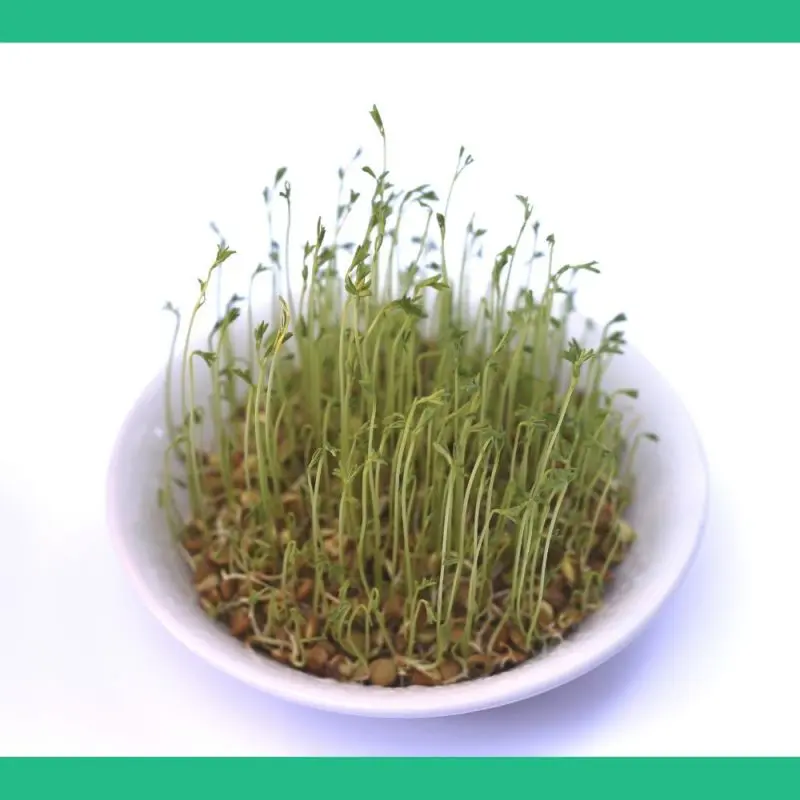
Microgreens are the same as regular lentil plants that are harvested before they reach maturity. And growing lentil microgreens is no different. They are a nutrient-dense addition to dishes and are commonly used in restaurants as a garnish.
Lentil microgreens also tend to be easier to digest, so if you have an issue when you eat regular lentils, this is a great option to try and see how it affects your digestion.
Many people love microgreens for their higher nutritional content, as microgreens have much of the nutritional value of more mature plants condensed into a smaller package so you don’t have to eat as much to get those nutrients into your body.
There are many types of lentils, so the antioxidants and nutrients will vary depending on the variety you’re growing, but many lentils contain a good amount of:
- Protein
- Fiber
- Potassium
- Folate
- Iron
- Manganese
Lentils are a great microgreen to eat, so let’s get into how you can grow these yourself.
Lentil Microgreens vs Lentil Sprouts
These words are often confused, so let’s dive into this a little.
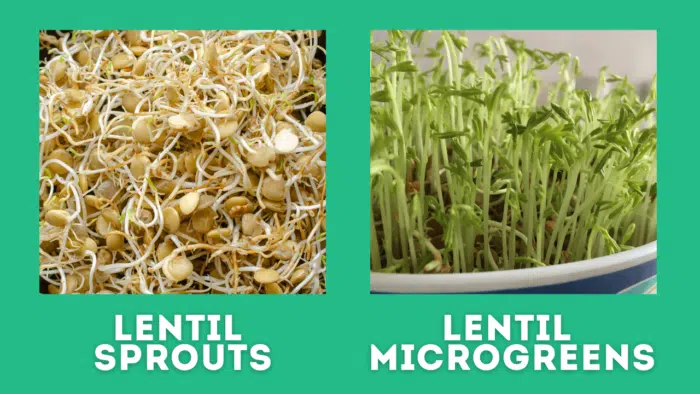
If you soak lentils and let them sit, they will produce a shoot at which point they are considered lentil sprouts.
If you let that sprout grow in some soil or other growing medium, they will grow roots and produce leaves at which point those greens are considered a lentil microgreen.

Can You Eat Lentil Microgreens?
You can eat both lentil sprouts and lentil microgreens as they are edible and full of nutrients.
How to Grow Lentil Microgreens
Growing lentil microgreens is pretty straightforward and simple for even the most novice gardener. Here are the steps for growing your own lentil microgreens.
Lentil Microgreens Supplies
Here’s what you’ll need to start growing your own lentil microgreens:
| Product | Quantity | Link |
|---|---|---|
| Lentil Seeds | 5-10 grams | View Product |
| Heat Mat | 1 | View Product |
| Microgreen Tray (with holes) | 1 | View Product |
| Microgreen Tray (without holes) | 1 | View Product |
| Harvesting Knife | 1 | View Product |
| Growing Medium | 1 | View Product |
| Grow Lights | 1 | View Product |
What You’ll Need
- Microgreen trays
- Grow lights
- Soil or another microgreens medium
- Lentil seeds
- Water source (i.e. spray bottle or watering can)
Yield: Generally a pound of lentil seeds will produce 2 pounds of microgreens.

1. Get Your Lentil Seeds
You can pick up lentil seeds at a variety of places, but there are a few things to look for. I always try and choose organic whenever I can to reduce the number of chemicals and pesticides I’m consuming.
A few good places to get lentil seeds for growing microgreens are:
2. Soak Your Seeds
You’ll want to soak your lentil seeds overnight, or for at least 8-12 hours to jumpstart the sprouting process. This can be done in a glass jar, reusable food container, or in a microgreens tray.
Once you notice sprouts shooting out of your lentil seeds, you’ll know they’re ready to be transplanted.
3. Prepare Your Growing Medium
While your seeds are soaking, it’s a good time to get the rest of your materials ready.
Microgreens need some kind of soil medium to go past the sprouting stage. This can include coco coir mats, seed starting mix, or even just a simple paper towel to help the roots flourish.
This will need to be moist to give the sprouts moisture to continue the growing process.
4. Plant Your Seeds/Sprouts
Since the seeds will already have sprouted, you don’t need to cover them with much soil. Transplant your lentil sprouts to the growing medium and make sure it’s moist enough for them to continue growing.
5. Incorporate a Light Source
Once seeds have sprouted, they do need some kind of light source to grow. I use these grow lights to make sure my plants have enough light.
Plants follow the light, so make sure the light source is directly above and close enough that they do not become leggy and start stretching to get more light.
While you do want taller plants for microgreens, leggy seedlings are not as dense and will produce lower yields.
Lentil microgreens will need this light source throughout the rest of their growing life.
6. Water and Watch
You want to keep a close eye on your microgreens and water as necessary. This will vary depending on how dry or humid your grow room is, but a good rule of thumb is to actually feel the soil or growing medium and make sure it’s moist, but not overly moist.
Think of a wet sponge, you want it to be wet, but not dripping.
7. Harvest Your Lentil Microgreens
Around 3-5 days after germination, your microgreens will be ready for harvest!
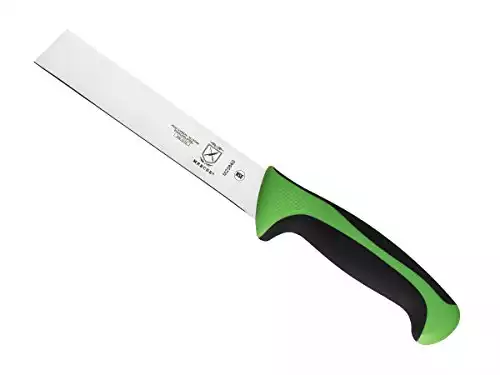
You can use a regular knife or pair of scissors, but getting the right knife (this is a great one that is super affordable) will provide a clean cut and a more professional look which is important if you’re selling these to restaurants or at a farmers market.
- Ergonomic handle- a combination of Santoprene for comfort and polypropylene for durability
- Textured finger points provide slip resistance, grip, and safety. Protective finger guard.
- Made from the highest quality Japanese steel which allows for easy maintenance and a razor-sharp edge
How to Store Lentil Microgreens
Keep your microgreens in the refrigerator after harvest for proper storage. Don’t rinse the microgreens until you’re using them as they will store longer and prevent
They will last around 3-7 days or more if stored properly.
What Do Lentil Microgreens Taste Like?
Lentil sprouts and microgreens (also known as lentil shoots) have a nutty, earthy taste that almost tastes like peas. You can add them to any dish where you want a little kick of nutrients and a nutty flavor.
Growing lentil microgreens is an easy way to grow your own food and incorporate more nutrient-rich foods into your diet.


